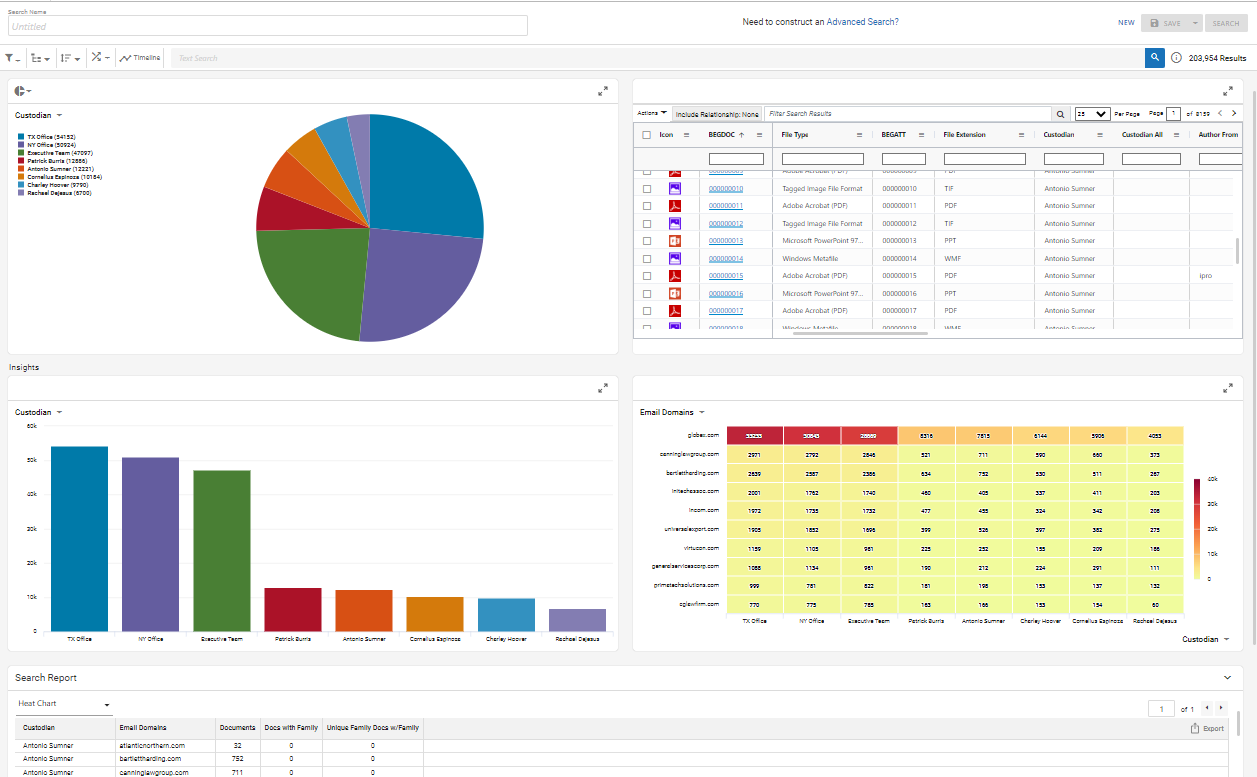
Manage Tag Palettes
The tag palette includes groups of tags that are to
be applied to each document in your case. To ensure proper
and efficient review processes within your organization, OPEN DISCOVERY Review enables
you to define and manage tag groups and tags for each case. This figure
shows an excerpt of a typical tag palette.
Changes to tag groups and tags can be made after case
review begins (with the exception that tag groups/tags in use cannot be deleted).
Plan Tag Definitions
As with many OPEN DISCOVERY Review tasks, proper planning helps ensure that the tags and tag groups you define match required case
review activities.
-
Groups:
Consider the groups that you require, naming conventions, and group rules.
See the table in Work with Tag Options for details about rules.
-
Tags:
Give some thought to the tags to be included in each group and naming
conventions.
-
Nested
tags: Understand the behavior of nested tags so that tags are organized as intended.
Also consider the information users will require
to properly apply tags and create appropriate case instructions.
Nested Tags
Nested tags include primary (parent) tags and one or
more subordinate (child) tags, as in the following example. Multiple levels
of tags can exist, creating a tree of related tags. Only the most subordinate member(s) of a nested tag
group can be applied, and when such a tag is applied, its parents are
also applied. In the following example, if the Copyrights tag is applied, the Intellectual Property and Agreements
tags are also applied.
To create tag groups and tags for a case:
-
Getting
started:
-
In OPEN DISCOVERY Review, click a case card.

-
Click the Enter Case button.

The Visual Search dashboard appears.
-
Click the Case Settings icon.
icon.
The case setting tabs display in a ribbon bar at the top of the screen.
-
Click the Tag Palette tab. The Tag Palette screen displays.
-
The left panel displays the list of tag groups already created. To create a new tag group, select the plus icon  at the top of the list, beside the search bar.
- Enter the tag group name (up to 100 characters), and
then click Save.
-
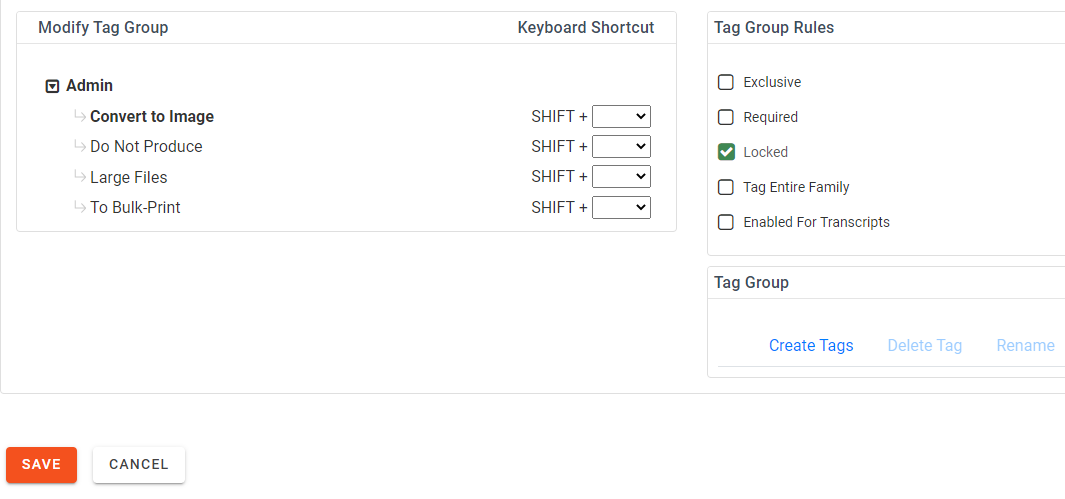
Select required tag group rules. See Work with Tag Options.
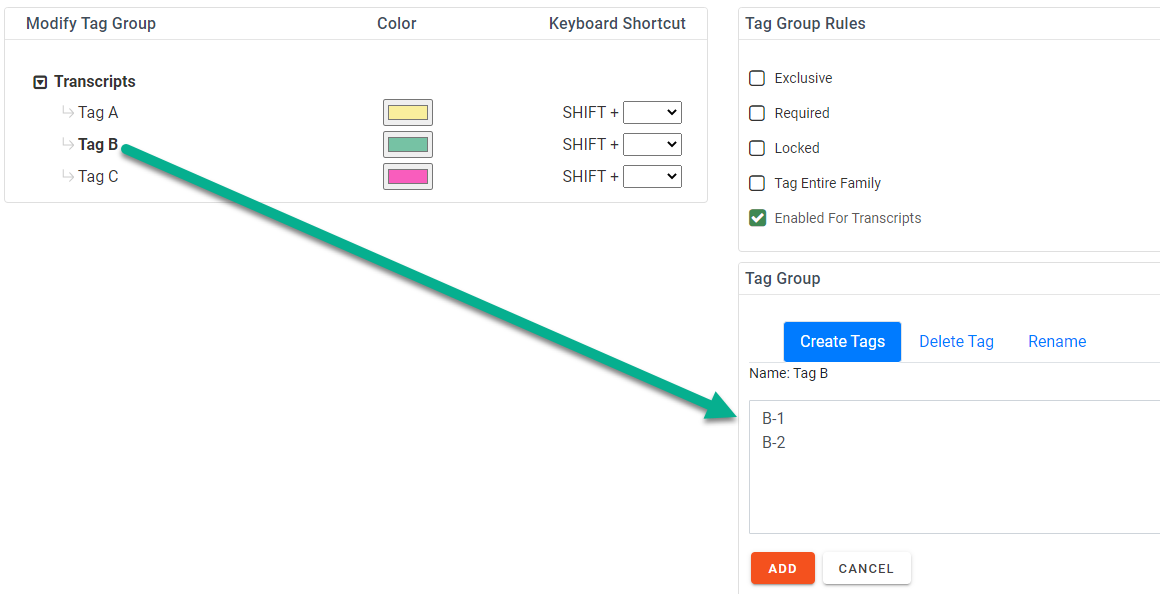
Create the group's tags as follows:
- Click Create Tags.
-
In
the Tag Group area, enter the group’s
tags (up to 250 characters for each name). Enter one tag name on each line
as shown in the following figure and ensure each name is unique.
-
When
all tags have been entered, click Add.
- If
nested tags are required for a newly created tag, click that tag in the
list and repeat steps a through c for the nested tags.
When all details for the new tag group are
complete, click Save. The new
tag group is now available to be added to a coding form for the case.
Repeat the above steps to create all required tag
groups/tags. If you enabled tags for transcripts, each one will be associated with a default color, which you can change.
After the tags have been created, you can associate them with shortcut keys to allow for faster review. For more information, see Work with Tag Options.
To revise or delete an existing tag group:
-
Getting
started:
-
In OPEN DISCOVERY Review, click a case card.
-
Click the Enter Case button.
The Visual Search dashboard appears.
-
In the left panel, click the Case Settings icon. The case setting tabs display in a ribbon bar at the top of the screen.
- Click the Tag Palette tab. The Tag Palette screen appears.
-
Select the pre-defined tag palette on the left panel that you want to modify or delete.
|

|
Note: If you want to sort the tag palettes list, click the sort ( ) icon to display the sort menu and select a sort option. ) icon to display the sort menu and select a sort option.
|
-
To delete the selected tag group:
- Click the delete
 icon.
icon.
- Then, click OK to respond to the confirmation message.
|

|
Tip: If a
group’s tags have been applied, the group cannot be deleted (the
Delete button will not
be available).
|
-
Click the edit  icon and
continue by performing the following steps as required.
icon and
continue by performing the following steps as required.
To rename
the tag group:
-
Click
the tag group name under the Modify Tag
Group heading.
-
Click
Rename in the Tag
Group area.
-
Enter
the new group name (up to 100 characters) and click Update.
-
If required, make changes to tag
group rules.
-
If tags must be changed, continue by performing the
procedure in the next section. If not, click Save.
Public Tags
To revise or delete public tags:
-
Complete
the introductory steps in Modify Public Tag Groups or Tags to access tag configuration.
-
With the required tag group selected, click the edit icon and perform the following steps.
-
To add
new tags:
-
Click
Create Tags.
-
Add
the tags (one per line, up to 250 characters for each tag name) and click
Add when finished.
-
Continue
with other changes or skip to step 7 if changes are complete.
|

|
Note: Nested (child) tags can
also be added to tags, with certain restrictions:
-
If a tag has no child tags and has not
yet been applied to documents, then child tags can be added.
-
If a tag has no child tags but has been
applied to documents, then child tags cannot be added.
-
If a tag has child tags, additional child
tags can be added, whether or not any of the tags have been
applied.
|
-
To rename
a tag:
-
Click
the tag name in the Modify Tag Group
area, then click Rename.
-
Revise
the tag name (up to 250 characters) and click Update.
-
Continue
with other changes or skip to step 7 if changes are complete.
-
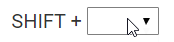
To assign a keyboard shortcut to a tag:
-
Select the keyboard shortcut drop-down field associated with the tag.
- On the drop-down menu, select the key you would like to assign for the shortcut. Keys that have already been used are grayed out.
- Continue
with other changes or skip to step 7 if changes are complete.
-
To delete
a tag:
-
Click
the tag name in the Modify Tag Group
area, then click Delete Tag.
-
Click OK to respond to the confirmation message .
-
Continue
making other changes or skip to step 7 if changes are complete.
|
|
Note: Tags that have been applied
(listed in red) cannot be deleted.
|
-
When all changes are complete, click Save.
-
Notify users of tag changes and provide instructions
as required
Related Topics
Overview: Tags
Work with Tag Options


 Create New Tag Groups and Tags